
🎞 How to set up your Project in Davinci Resolve

👉 How do I begin to edit in Davinci Resolve
📖
Read Time 2 Mins 00 Secs
Are you new to Davinci Resolve, Here is what you have been waiting for a complete getting Started Guide for Davinci Resolve.
🎞 Here's some Practice Footage
This can be downloaded by clicking on the button below.
ℹ️
Key - Right Click - means right mouse button click. > - means next step e.g. File > New Bin. Italics

1. 👩💻 Download Davinci Resolve
The software can be downloaded for free from Black Magic Design's website.
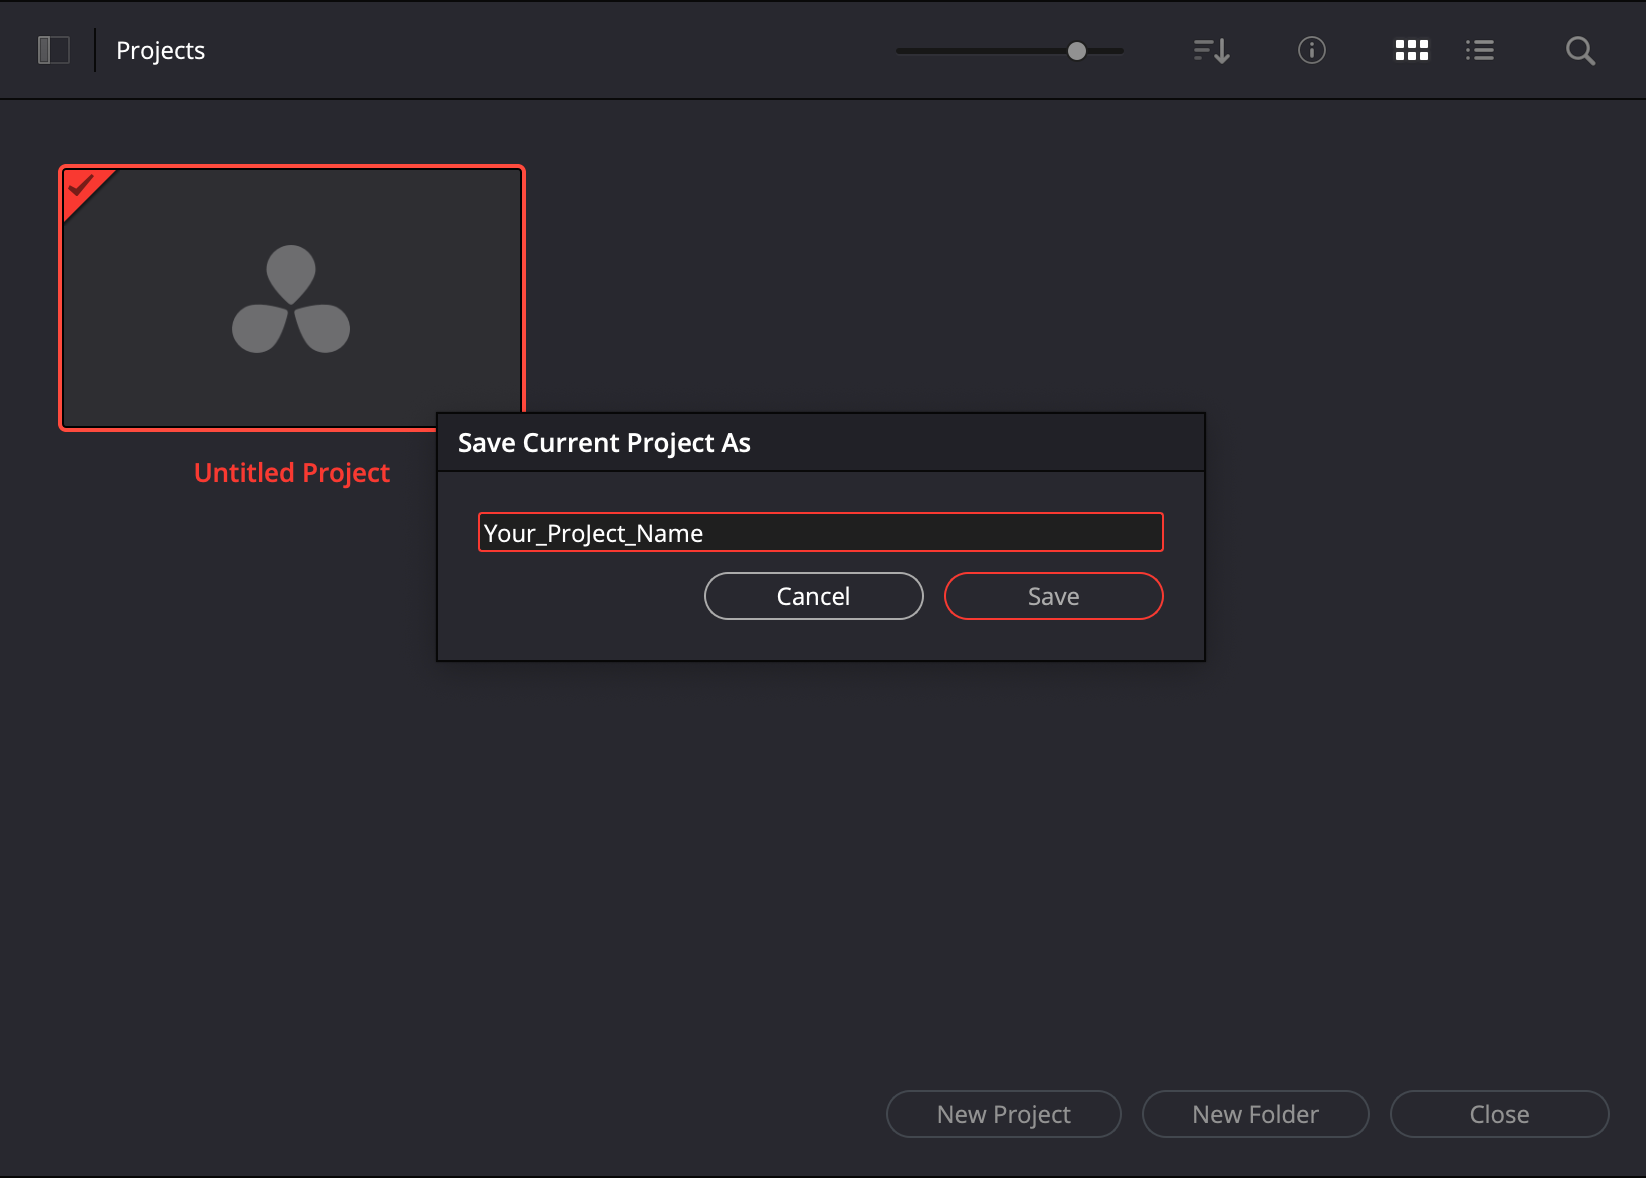
🎨 2. Create a Project in Davinci Resolve
In the project Manager - Click 'New Project'.
⌨️
Keyboard Shortcuts - Make a 'New Project' - (Shift + Command + N - Mac) (Shift + Control + N - PC).
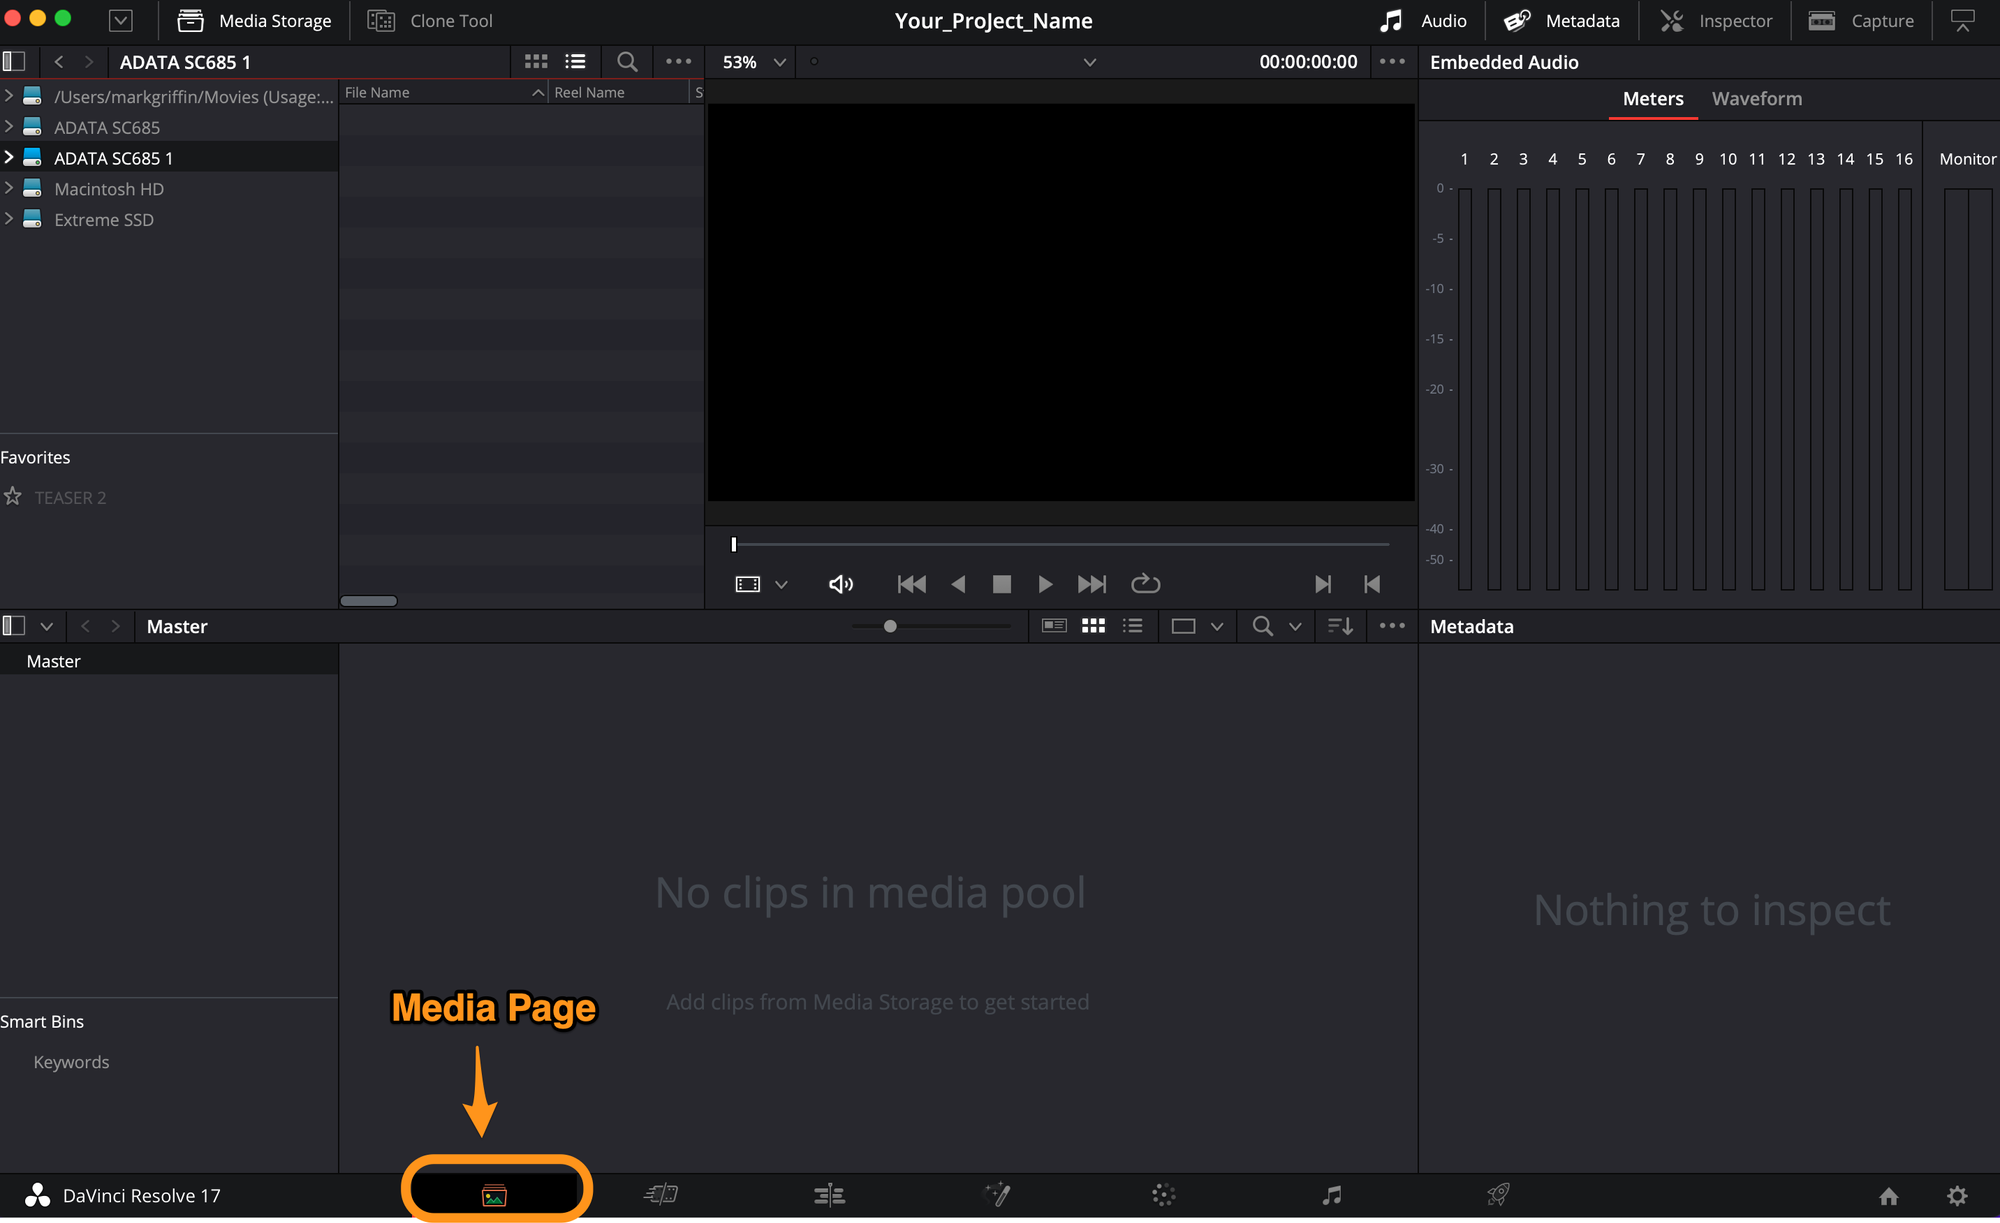
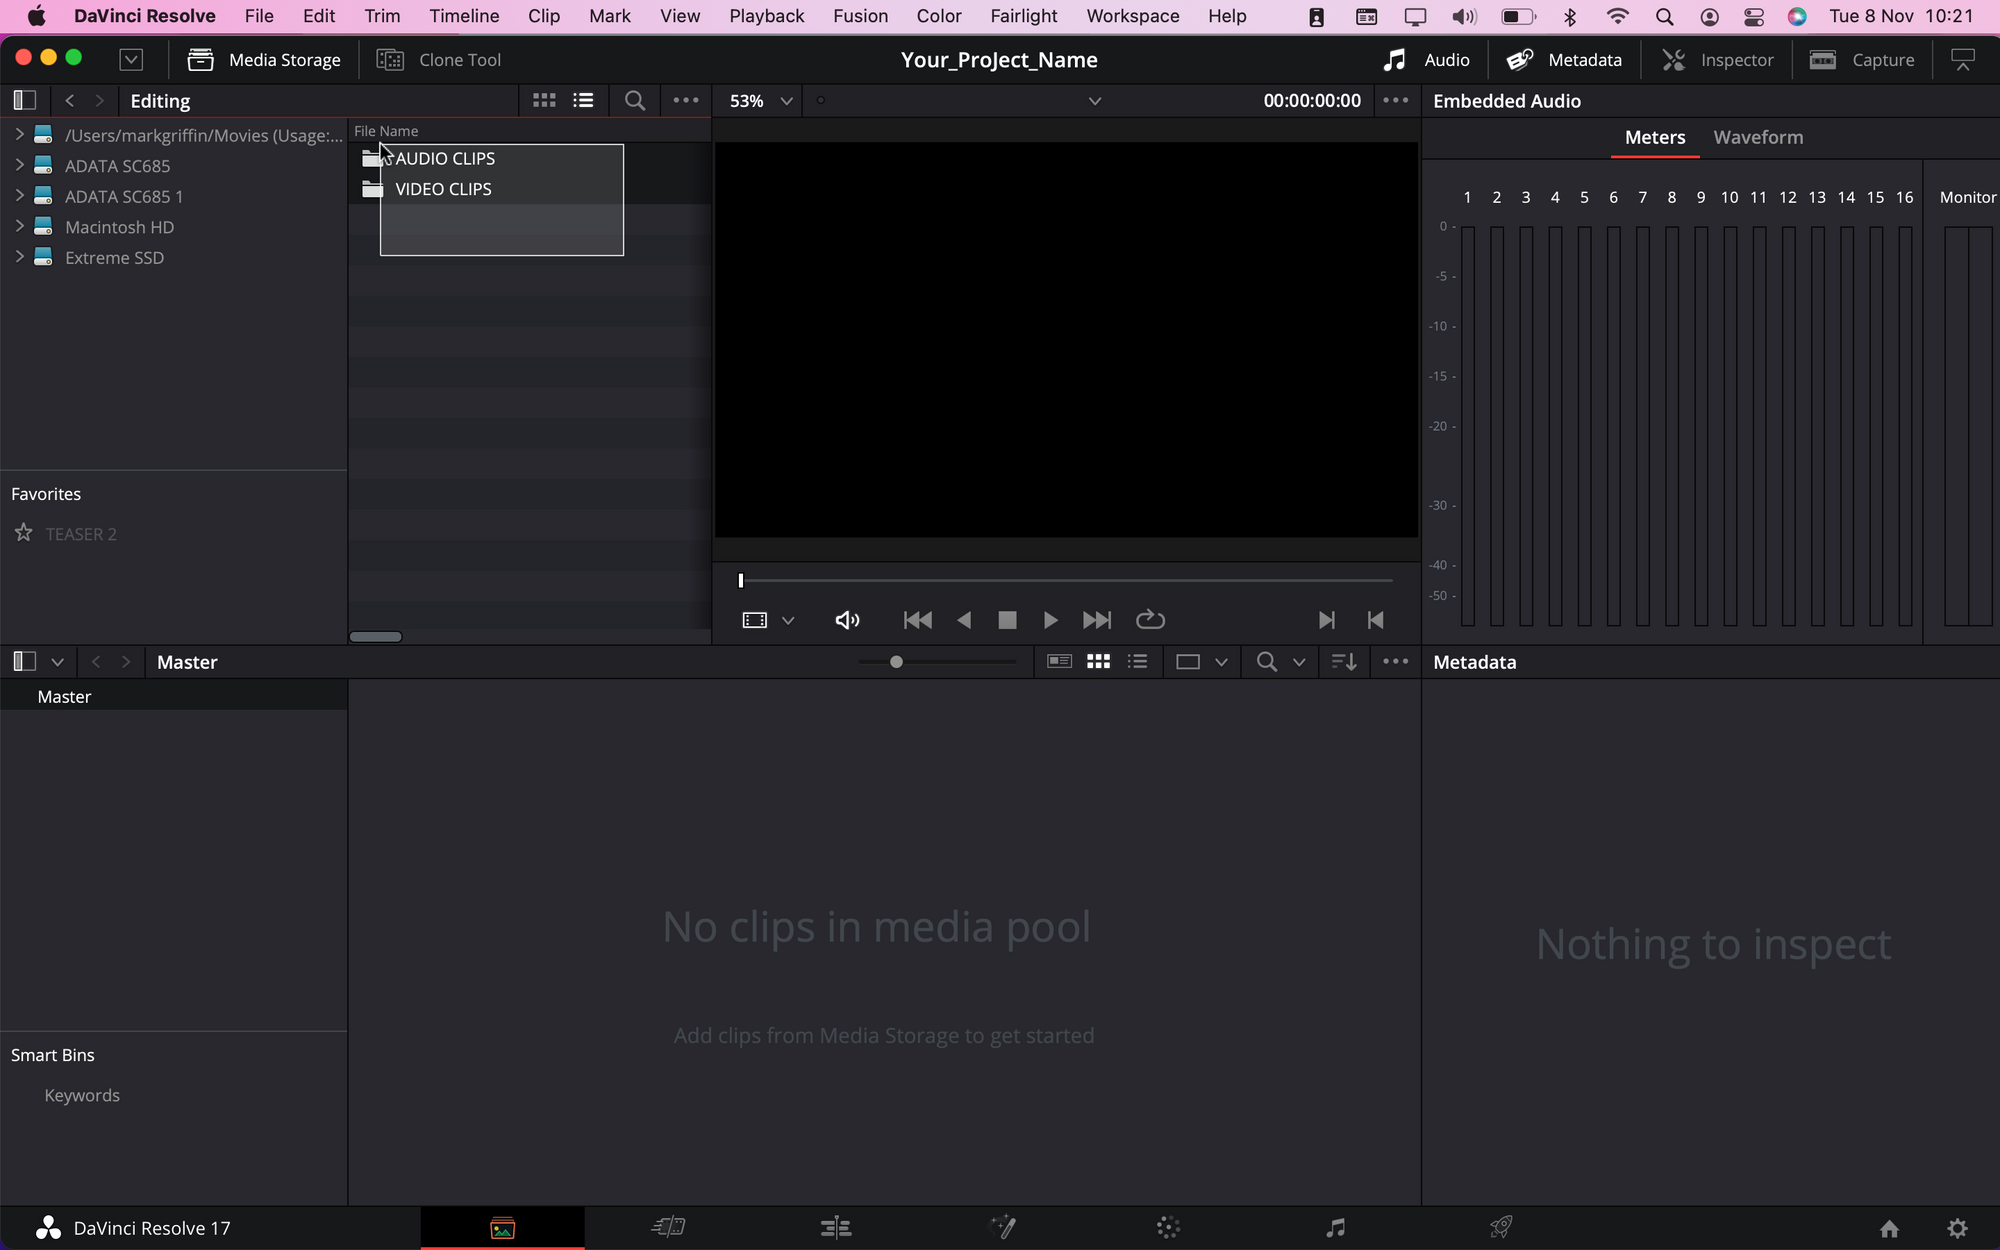
3. Davinci Resolve will then open into the 'Cut' Page. You want to open the 'Media' Page.

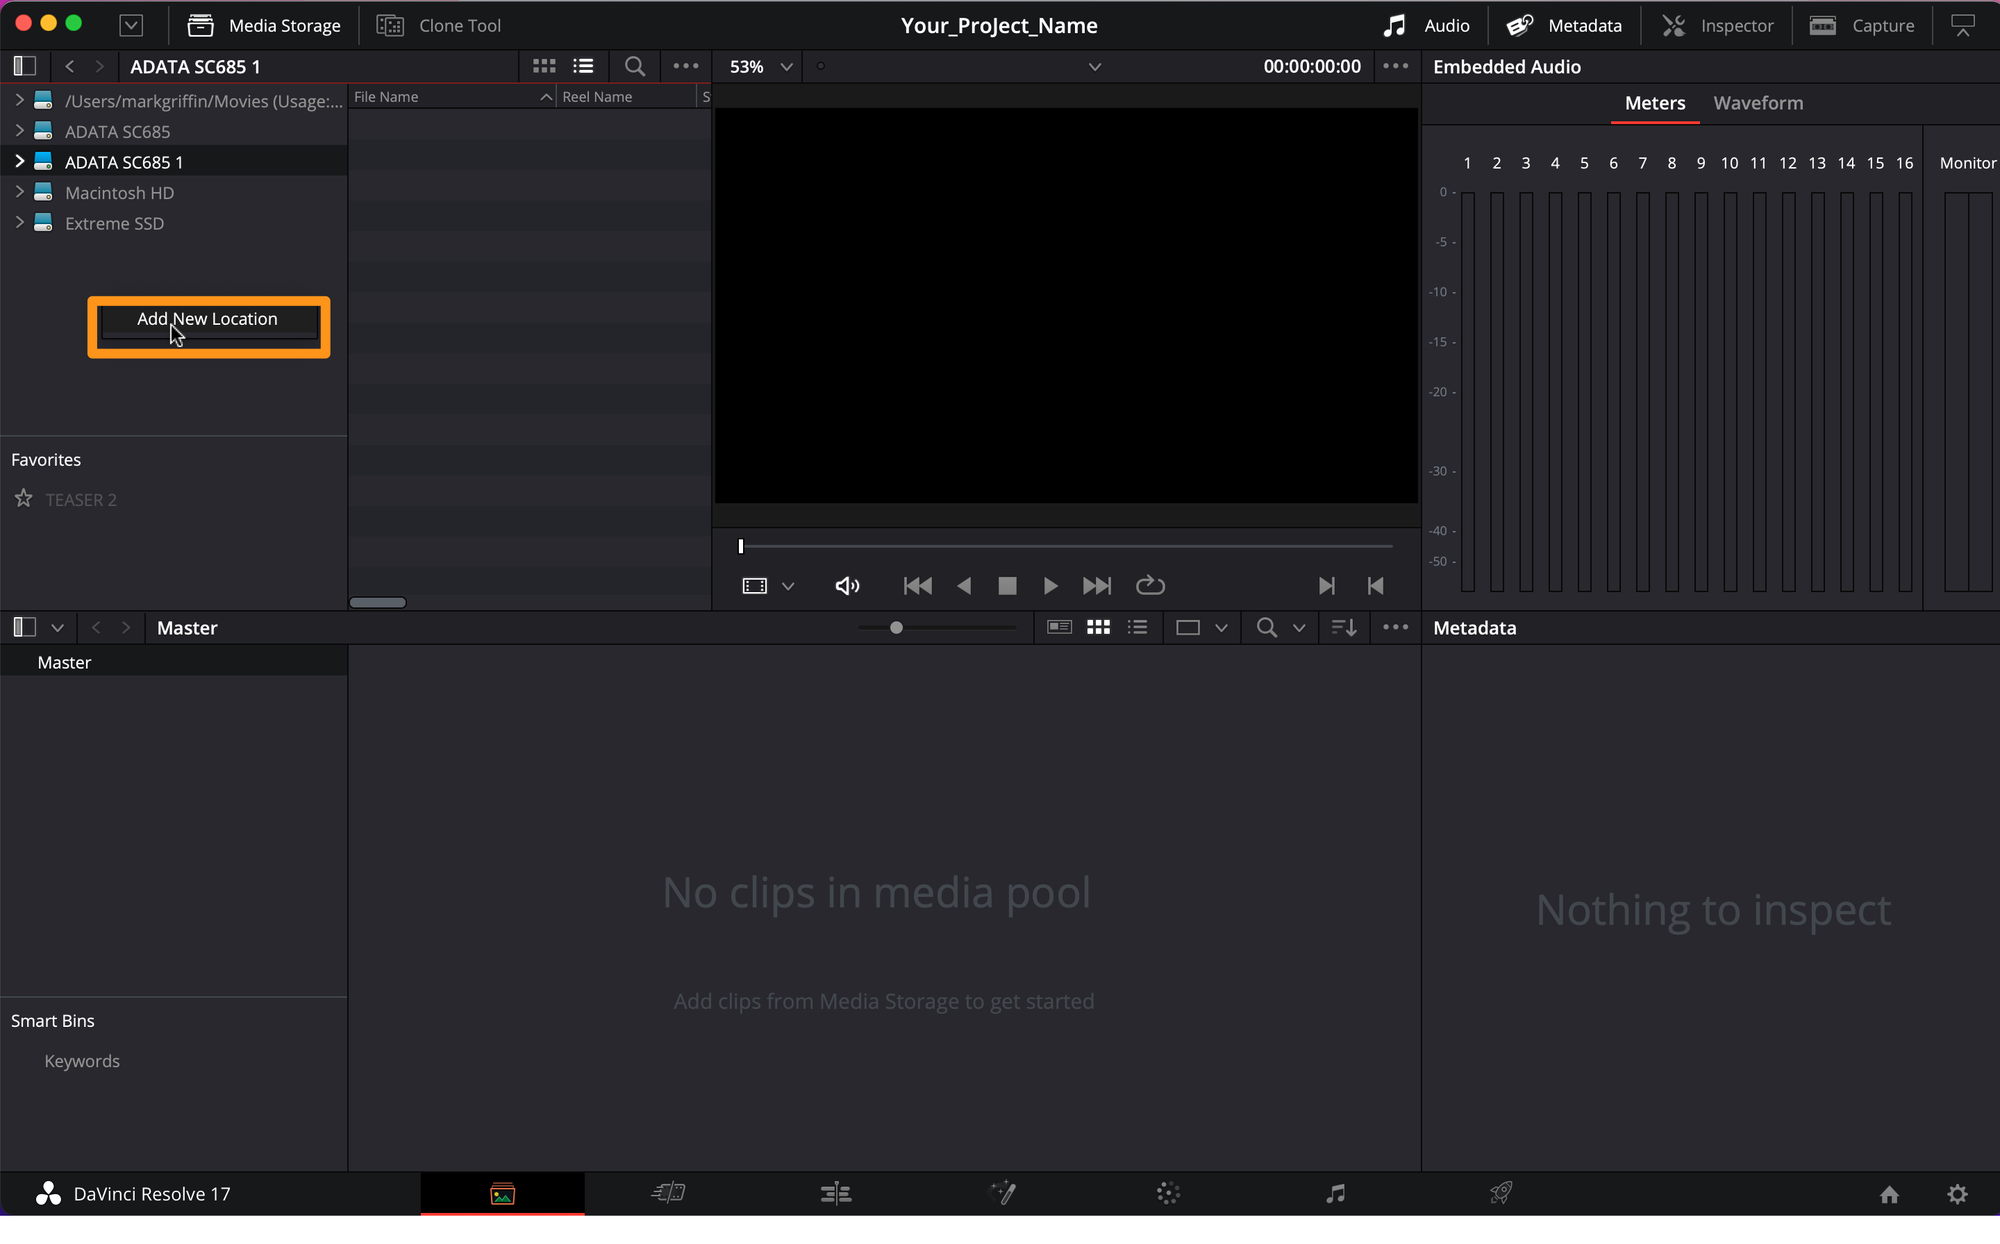
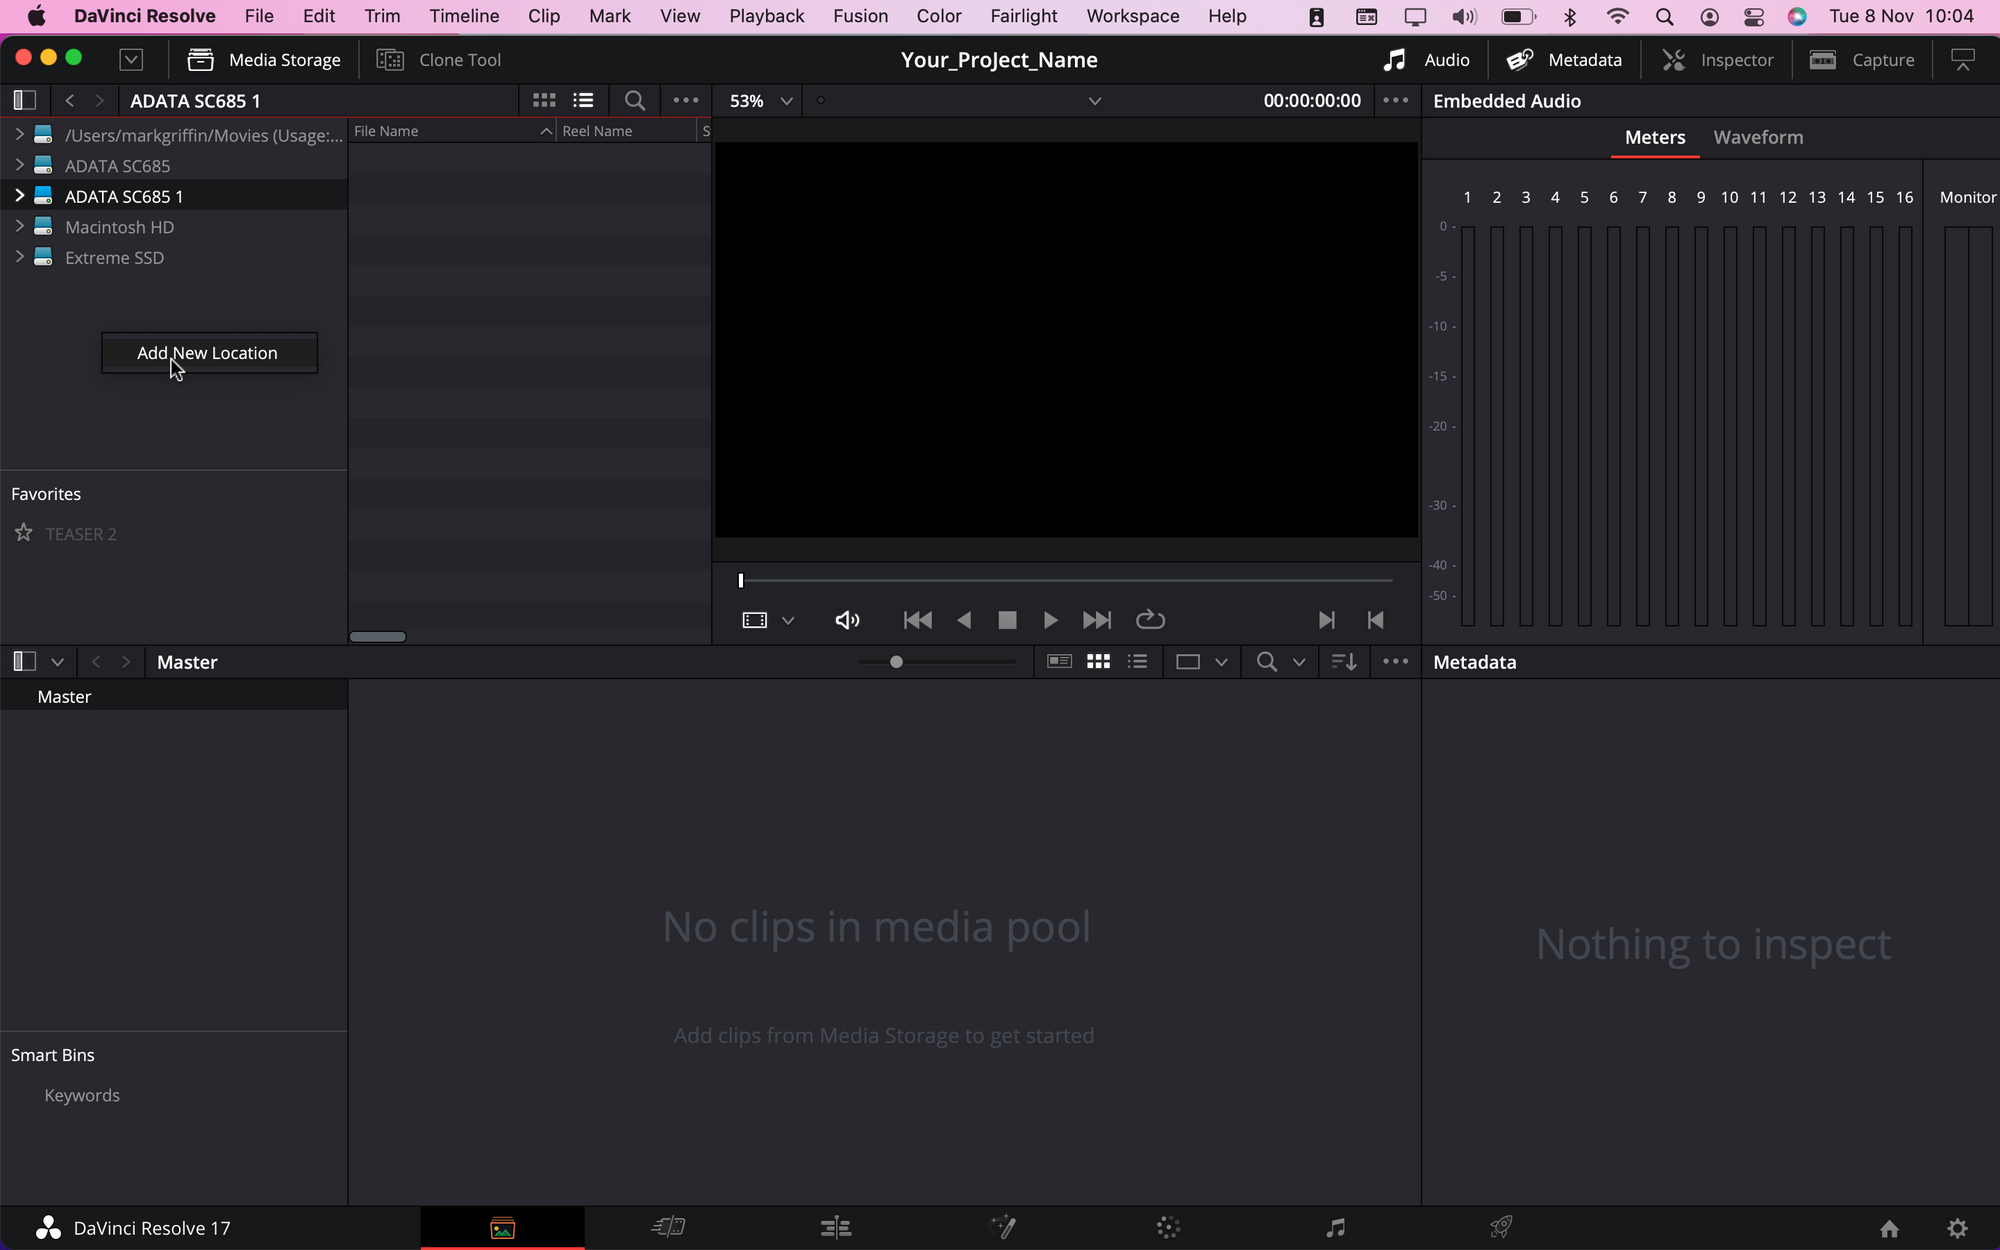
- If you are working with drives (System Storage) in the top left you can add a new location. (see below).
- Right click - Add New Location.
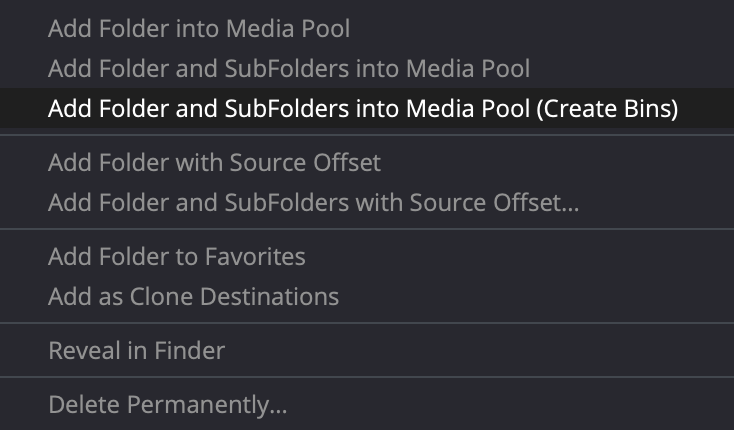
🎞 4. Adding Media in Davinci Resolve

- Right click and draw a square (Marquee) around the folders.

- Right click and choose from the drop down menu.
- Next choose Add Folder and Subfolders into Media Pool (Create Bins).

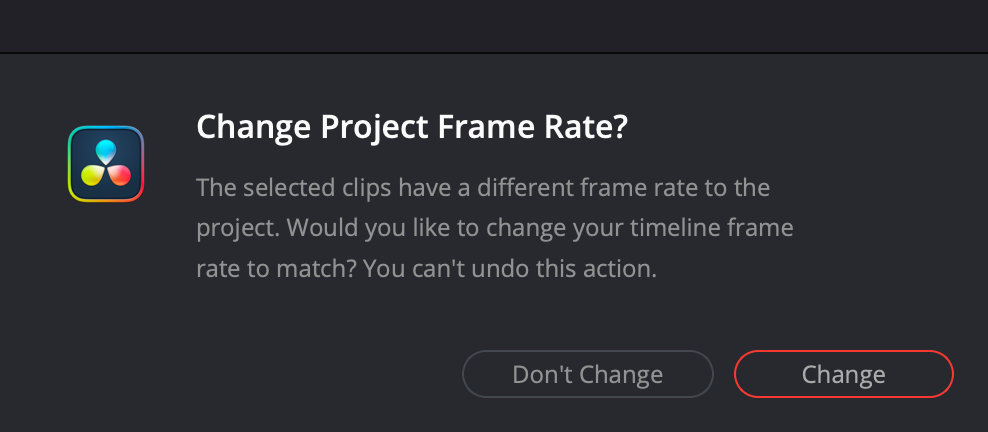
5. Change Project Frame Rates
- A dialogue box will appear - Asking whether you wish to change the Frame Rate?
- Choose - Change.
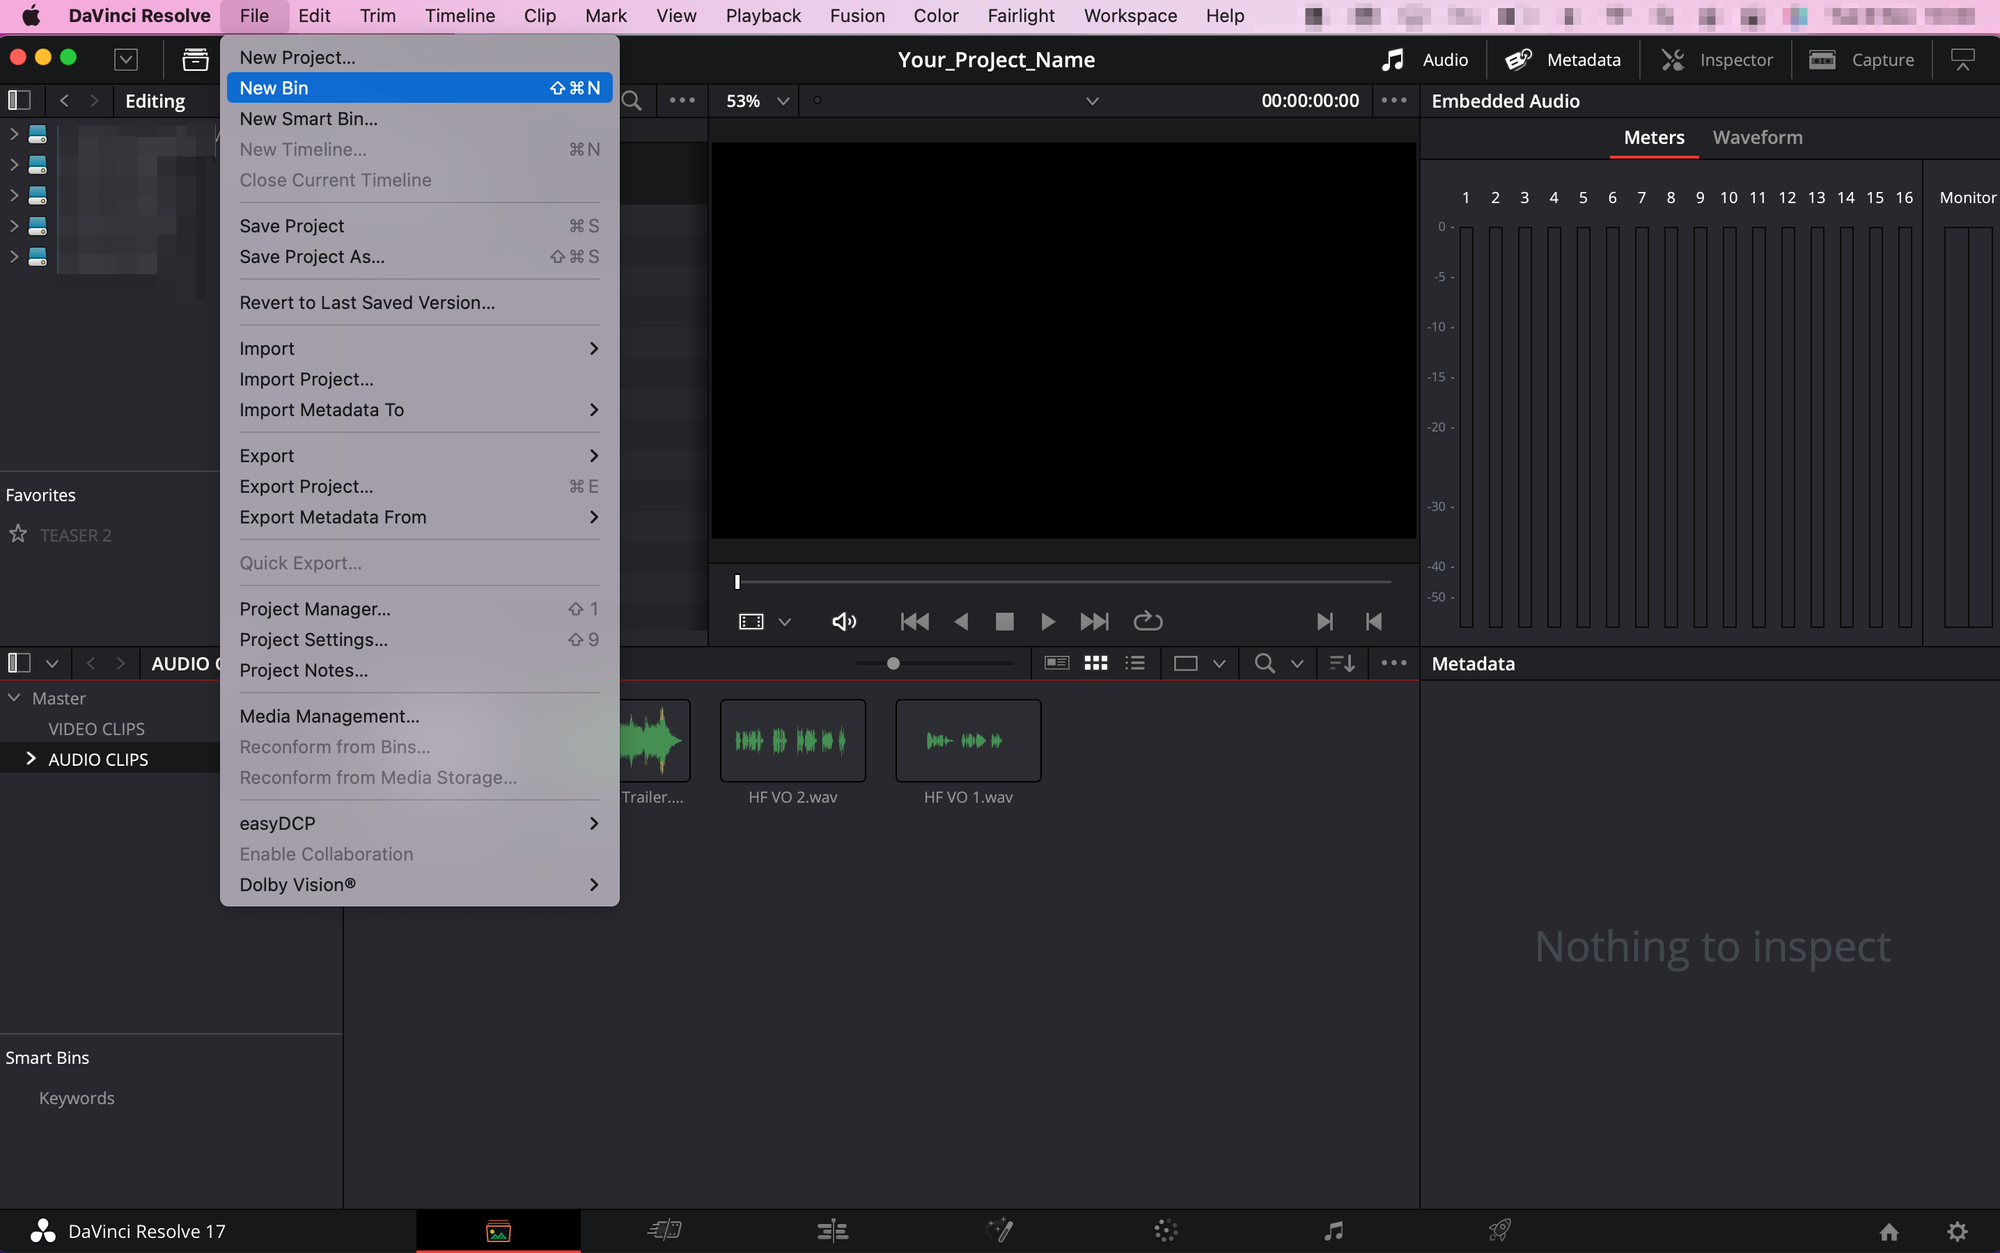
6. Creating New Bins and Master Bins

- File > New Bin
⌨️
Keyboard Shortcut - (Shift + Command + N - Mac) (Shift + Control + N - PC).
- You can also select multiple clips and right click and choose - Create Bin With Selected Clip.
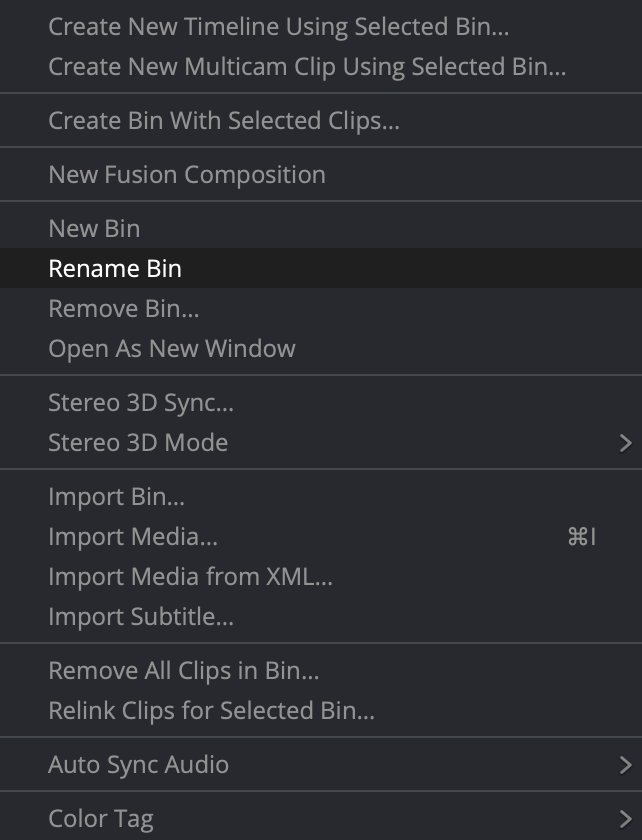
7. Rename a Bin (if Needed)
- You can drag and drop clips into bins.
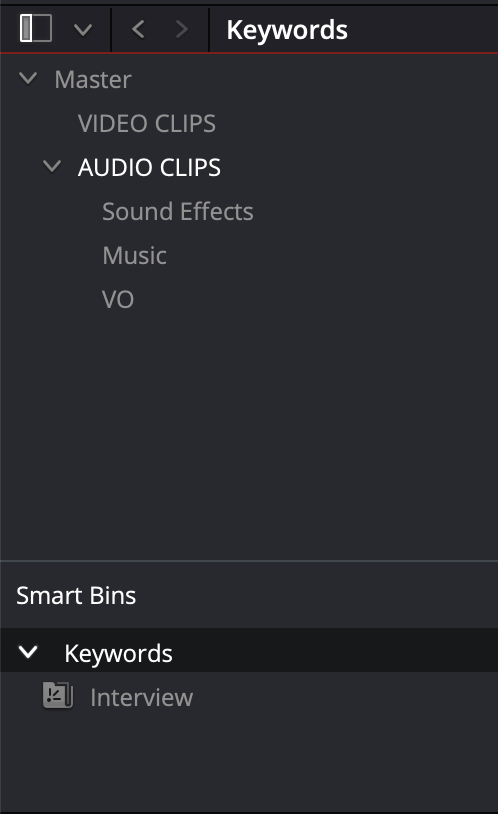
8. Using Smart Bins in Davinci Resolve
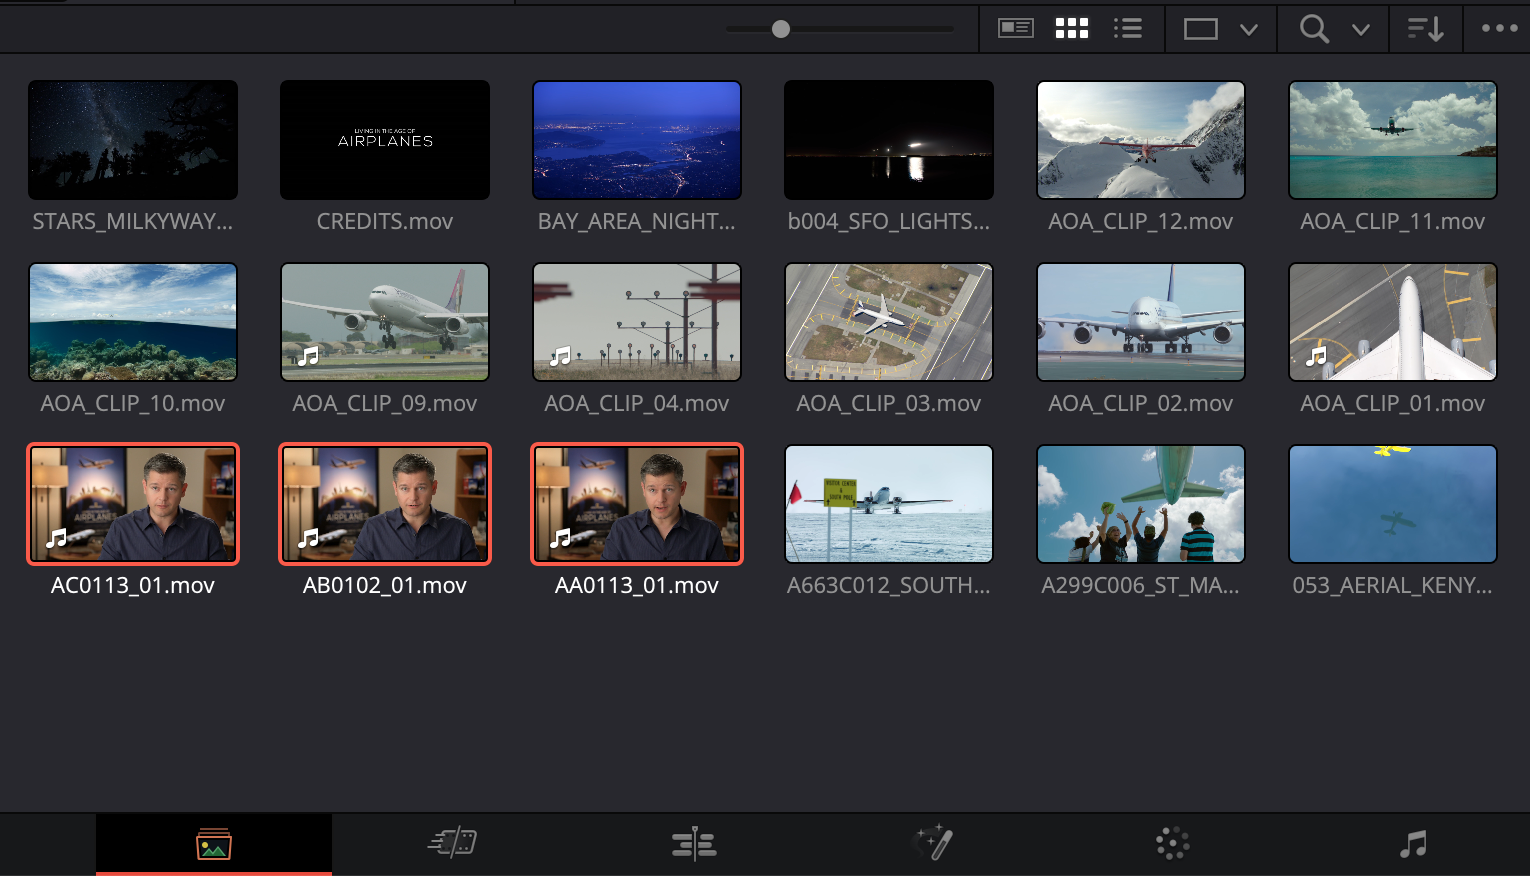
- In Davinci Resolve you can preview clips by scrubbing over them.
⌨️
Keyboard Shortcuts - Shift + S will turn off audio when scrubbing as well.
9. Working with Metadata
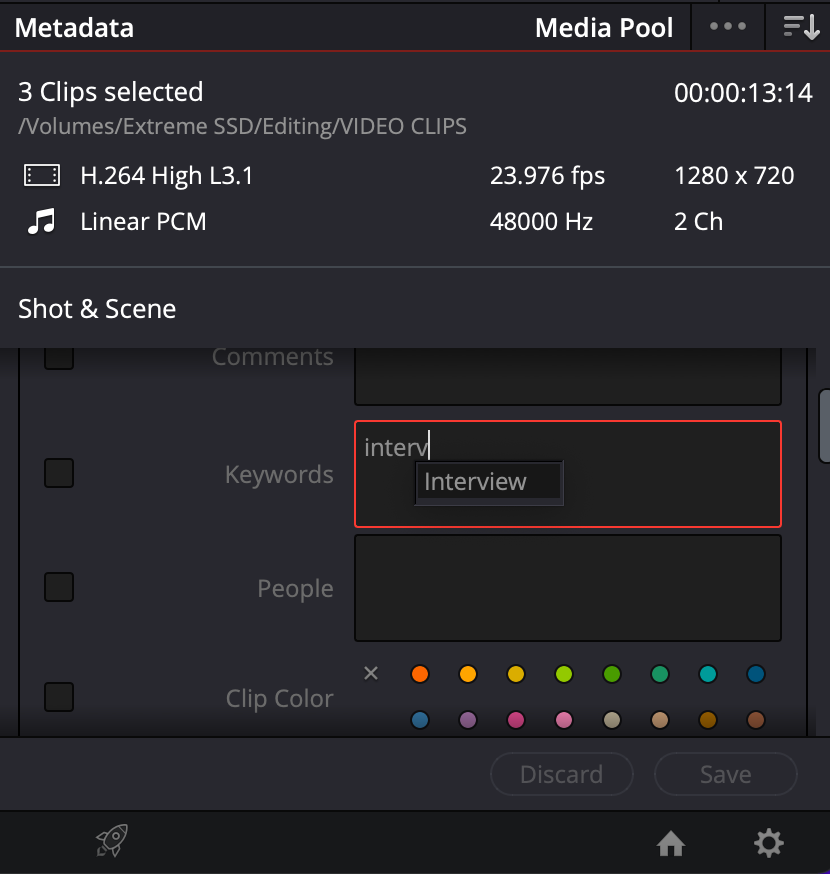
10. Using Smart Bins and Keywords
- Check over at the bottom section of your Master Bins, you will find Smart Bins > Keywords and if you toggle these down you will find 'Interviews' or the keyword you have created.


Davinci Resolve - Setting up your Project
🙏 Thank you for taking time out to read Davinci Resolve - Setting up your Project.